Why Strong Ankles Matter After a Sprain
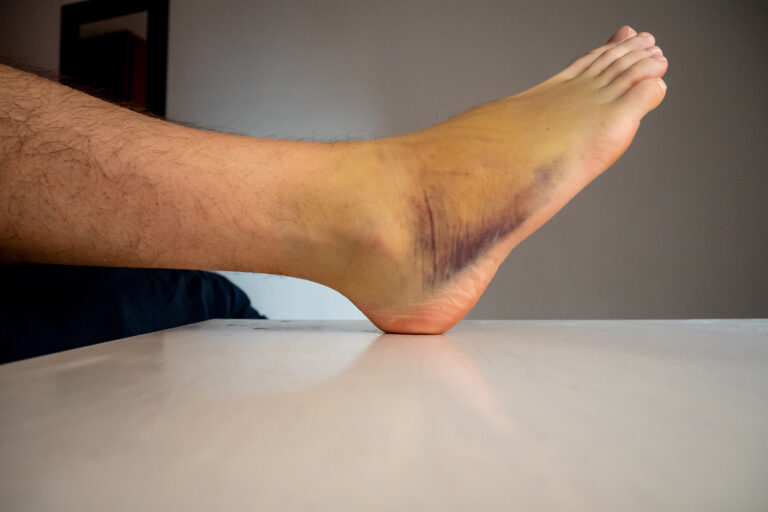
After a sprain, the ligaments that stabilize your ankle are stretched or torn, leaving the joint “loose” and your balance off. When those ligaments stay lax and the muscles around the ankle stay weak, people are much more likely to re-sprain the same ankle during sports, workouts, or even simple missteps.
Targeted ankle strengthening and balance work retrains the muscles and nerves around the joint so they react faster and support you in real-world movement. That’s why exercises are a natural extension of regenerative therapies like SoftWave: while SoftWave helps stimulate tissue healing at the microscopic level, your daily exercises reinforce that healing by teaching the ankle to move, load, and stabilize again under progressively higher demand.
When To Start Ankle Strengthening
If you’re in the very early stages of a sprain (days 1–3), your focus should be on calming swelling and protecting the joint before diving into strengthening. Once you can put some weight on the ankle and your provider clears you for gentle movement, you can begin low-load mobility and intrinsic foot work, then layer in more challenging balance and resistance as pain allows.
This guide assumes you’re beyond the acute “can’t put weight on it” phase and are ready to start rebuilding strength and stability. Always check with your chiropractor, physical therapist, or medical provider—especially if you’ve had surgery, a fracture, or multiple sprains in the same ankle.
How To Use This Progression
The 7 exercises below are grouped from beginner to advanced. You’ll:
- Start with gentle mobility and intrinsic foot strengthening.
- Add resistance band work for the ankle muscles.
- Layer in balance drills.
- Finish with power and plyometric progressions as your ankle tolerates more load.
Aim to do your ankle routine 3–4 days per week, leaving at least one rest day in between for healing. Most people benefit from 2–3 sets of 10–15 repetitions per exercise (or 20–30 seconds for holds), but pain should never climb above a mild, manageable discomfort.
Exercise 1: Ankle “Alphabet” for Mobility (Beginner)
This is your gentle on-ramp: it keeps the ankle moving through pain-free ranges while swelling and stiffness calm down.
How to do it
Sit in a chair with your injured leg stretched out and your heel resting lightly on the floor.
Using your foot like a pen, “draw” the letters of the alphabet in the air, moving from A to Z.
Keep the movement small and controlled, letting the motion come from your ankle, not your knee or hip.
Do 1–2 alphabets once or twice daily. If you notice more swelling or sharp pain, reduce the range of motion or take a break until symptoms settle.
Exercise 2: Towel Scrunches for Intrinsic Foot Strength (Beginner)
Your ankle stability starts at the foot—tiny muscles in your arch help maintain a strong base when you walk, run, or pivot. Weakness here often shows up as wobbling, collapsing arches, or difficulty balancing on one leg.
How to do it
- Sit in a chair with your foot flat on the floor and a towel placed under your toes.
- Keeping your heel down, curl your toes to “scrunch” the towel toward you.
- Relax, reset the towel, and repeat until your arch muscles feel mildly tired.
Aim for 2–3 sets of 10–15 scrunches per foot. Over time, you can progress by placing a small weight (like a light dumbbell) on the end of the towel to increase resistance.
Exercise 3: Resistance Band 3-Way Ankle Series (Beginner → Intermediate)
This series targets the major muscle groups that control your ankle in all directions—key for both rehab and injury prevention.
You’ll need a light to medium resistance band:
- Dorsiflexion (pulling toes up)
- Inversion (turning foot inward)
- Eversion (turning foot outward)
Start with 2 sets of 10–12 reps each direction, once daily. As this gets easier, increase to 3 sets or move to a slightly heavier band to keep building strength.
Exercise 4: Double-Leg Calf Raises (Intermediate)
Your calf muscles and Achilles tendon are the “engine” that propels you forward and helps decelerate landing forces when you walk or run. Strong calves protect your ankle from collapsing under you when you step off a curb or change direction quickly.
How to do it
- Stand near a wall or counter for light support.
- With both feet about hip-width apart, rise up onto the balls of your feet as high as you can without letting your ankles roll inward or outward.
- Pause for 1–2 seconds, then slowly lower your heels back to the floor.
Begin with 2 sets of 10 repetitions, and work up to 3 sets of 15–20. When you can do this comfortably and without wobbling, progress to single-leg calf raises for more challenge.
Exercise 5: Single-Leg Balance Progression (Intermediate → Advanced)
This is the progression that really changes your risk of repeat sprains by retraining your balance and “proprioception”—your body’s sense of where your joint is in space.
Stage 1: Single-leg stand, firm surface
- Stand on your injured leg with a slight knee bend.
- Use a counter or chair for light fingertip support if needed.
- Hold for 20–30 seconds, focusing on a steady gaze and quiet upper body.
Stage 2: Remove support
Stage 3: Add an unstable surface
- Stand on something slightly unstable, like a folded towel or foam pad, and repeat the single-leg holds.
- Start with eyes open; once this is easy, try brief bouts with eyes closed for extra challenge.
Work up to 3 holds of 30–60 seconds per side at each stage before moving on. This simple progression can significantly reduce repeat sprains because it teaches your ankle to react to real-life wobbles and uneven ground
Exercise 6: Star Reach Balance Drill (Advanced Control)
Once you’re solid on single-leg balance, the next step is teaching your ankle to stabilize while the rest of your body moves—a key for sports, stairs, and active lifestyles.
How to do it
- Stand on your injured leg in the center of an imaginary “star” on the floor.
- While keeping your stance knee slightly bent, reach your free foot forward and lightly tap the floor at the top point of the star, then return to center.
- Repeat tapping out to the front-diagonal, side, back-diagonal, and straight back, always returning to the middle.
Start with 3–5 taps in each direction, then switch legs. As you improve, increase the distance of the reach and reduce how much you touch down for support—this teaches your ankle to manage more demanding positions without losing control.
Exercise 7: Low-Level Hops and Jump Progression (Advanced)
For athletes and active adults, the final step is adding low-level plyometrics—gentle jumping drills—to prepare the ankle for quick, real-world forces. You should only add this stage when you can walk briskly and perform the previous exercises without pain or swelling.
Phase 1: Double-leg hops
- Stand with feet about hip-width apart.
- Perform 10–12 small hops in place, landing softly with knees slightly bent.
- Progress to 10–12 hops front-to-back, then side-to-side.
Phase 2: Single-leg hops
- When double-leg hops feel easy and controlled, progress to gentle single-leg hops in place.
- Eventually, add forward-backward and side-to-side single-leg hops over a small line on the floor.
Start with 1–2 sets of 10–12 hops and build slowly, watching for any increase in pain or stiffness later that day. If your ankle responds well, you can integrate this into your warm-up a few times per week to maintain long-term resilience.
How SoftWave Therapy and Exercises Work Together
SoftWave Therapy is designed to stimulate healing responses in injured tissues by increasing local blood flow, supporting cellular repair, and signaling your body to remodel damaged structures. When you pair that with a progressive strengthening plan like the one above, you’re essentially telling the healing tissue, “this is how we need you to perform”—so fibers line up better, joints move more efficiently, and you’re less likely to fall back into the same injury pattern.
At Simply Well Chiropractic in Cincinnati, we often schedule ankle strengthening drills shortly after SoftWave sessions once pain allows, so patients can take advantage of that window of improved circulation and decreased stiffness. Over time, this combination helps many people move from “just healed” to “truly stronger than before,” which is the goal for anyone who’s been frustrated by repeat ankle sprains.

Putting It All Together: Sample Weekly Plan
Here’s how an at-home routine might look for someone rehabbing a sprained ankle or working to prevent injuries:
- Phase 1 (first 1–2 weeks of exercises)
- Alphabet, towel scrunches, band series, double-leg calf raises, single-leg balance (firm surface).
- Phase 2 (next 2–4 weeks)
- Band series (heavier band), single-leg calf raises, single-leg balance (unstable surface), star reaches.
- Phase 3 (ongoing performance phase)
Each phase overlaps; you don’t “ditch” the earlier basics—they remain part of your warm-up and maintenance. The key is steady progression without big jumps in difficulty, and checking in with your provider if symptoms flare.
Schedule Your Ankle Strength & SoftWave Assessment
Ready to stop the cycle of “weak ankle, repeat sprain”? Book a focused ankle strength and SoftWave assessment at Simply Well Chiropractic in Cincinnati. We’ll evaluate your ankle stability, customize your at-home exercise plan, and show you how SoftWave can support faster tissue healing so you feel stronger with every step. Call us today or click to request your appointment and start rebuilding your ankle the right way.

Written and medically reviewed by Dr. Faith Swartzendruber, DC
Ohio Chiropractic License: DC-05144 | Palmer College of Chiropractic
Founder, Simply Well Chiropractic, Cincinnati
– Freya